
This is a series of posts that were requested by readers when I first began blogging waaaay back in 2011. It walks you through the starting the starter process one day at a time. This is day 8.
You can find How to Start a Sourdough Starter Day 1 here, Day 2 here, Day 3 here, Day 4 here, Day 5 here, Day 6 here, and Day 7 here.

Feeding number 14/Building Up
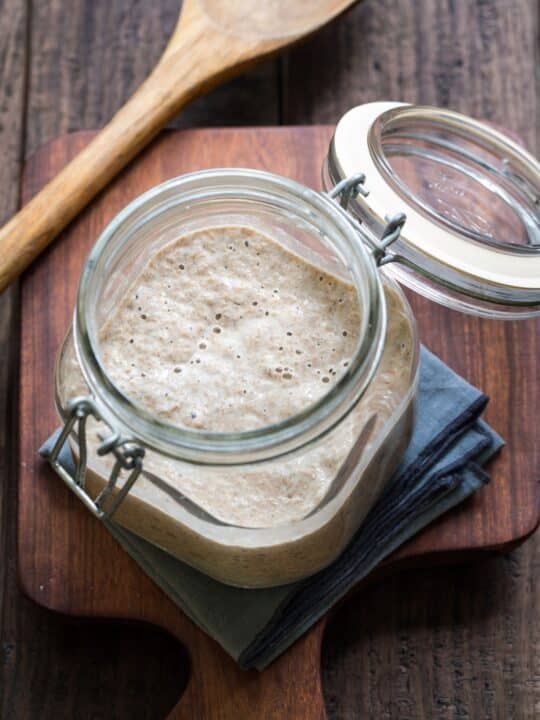
Well my friends, this morning was the last official feeding for Beowulf in the “starting the starter” category.
But don’t worry, I’ll keep feeding him. This is what he looked like this morning.

Do you see that line around the top of the jar? That is how far up it rose last night!
Again, I’m a little excitable.
Remember that the temperature, the size of your jar, and the level of your starter after feeding will determine how high it gets.
For this last feeding, I poured the starter into a bowl.
I did not discard 1/2 of it this time.
And I added twice as much as I have been.
This is the building up process that I talked about yesterday.
In order to have enough starter to make this Basic Sourdough Bread Recipe, you need 3 cups for the recipe and enough to save so you can keep it going.
This is what Beowulf looks like now in this stage.

He is now covered with plastic wrap and sitting on my kitchen counter.
You can use a bread cloth or a clean dish towel to cover your starter instead of plastic wrap. I do that a lot, actually.
But today I have all the doors and windows open and I don’t want anything getting in it that shouldn’t be in it.
Flours
While Beowulf is busy getting ready to be made into bread, let’s talk briefly about flour.
This may come as a shock to you, (it did to me), but all flour is not created equal.
Different types of grain make different types of flour which is better for different types of things.
For making bread, the higher the protein content, the better your bread will rise.
This is especially important when you are using a new starter.
In general, unbleached flour has more protein than bleached.
In general, bread flour will have more protein than most all-purpose flour. There are probably exceptions to these general rules.
A few more general things about flour.
If you freeze your flour, (which is a good idea if you buy in bulk), make sure the flour is at room temperature before using it.
When you open a new bag of flour, or if you just store it in the bag instead of a canister, use a knife or fork to stir and aerate it before you measure.
When you measure a cup of flour that has settled, it can equal as much as 1 1/4 cup of aerated flour.
Whole-wheat flour will absorb more liquid than white flour.
You cannot do a straight 1-to-1 substitution of whole-wheat flour for all the white flour in a recipe. You can usually get away with about a cup, depending on the volume of the recipe.
After that, you have to fiddle with it to get it the right consistency.
Most whole-wheat bread recipes have about 2 cups of white flour in them so that they rise better.
100% whole-wheat breads are very dense and chewy.
And, lastly, temperature and humidity affect the flour’s ability to absorb liquid. That is why in bread recipes you don’t have an exact measurement for flour.
Keep in mind also, that for sourdough recipes, how much flour you need will also depend on how thin your starter is.
The thinner the starter, the more sour the final product. I use a fairly thick starter for everything I make, since we don’t like the really tangy stuff.
One last thing. I mostly use my white flour starter for everything sourdough I make, so my recipes call for white flour.
You can still use the recipes with whole-wheat flour, you will just have to experiment with them to get them to come out the way you want them.
There are many recipes available on the internet for using whole-wheat sourdough starters. Some of which I actually adapted for my white flour starter. 🙂
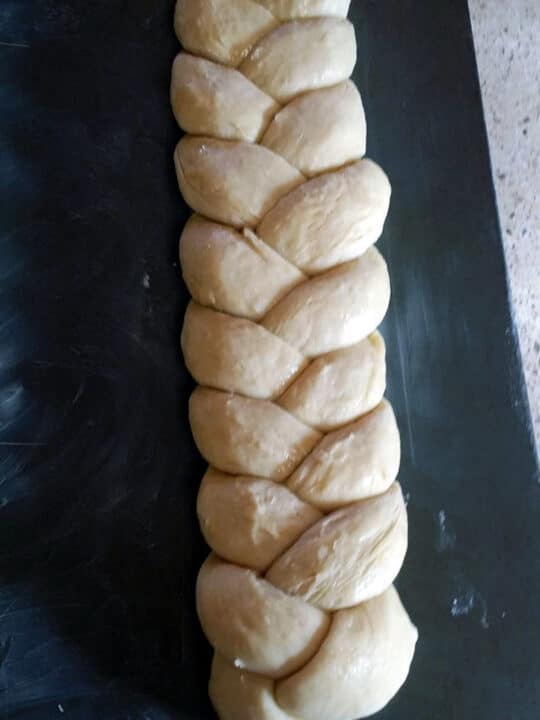
Enough about flour, let’s bake!
This is what Beowulf looked like after the building up process.

Basic Sourdough Bread Recipe
Yield: 3 sandwich loaves
Ingredients
- 3 cups sourdough starter that is active and bubbly
- 1 & 1/2 cups water
- 1 Tbsp sea salt (if you use regular salt, only use 3/4 Tbsp)
- 4-8 cups organic, unbleached flour
- Melted butter for brushing on top of the loaves
- 1 Tbsp yeast (or 1 package – this is optional. I use it with new starters or on days when I am in a hurry.)
Instructions
Stir down your sourdough starter and measure 3 cups into a large mixing bowl.

You can see the thickness of the starter. Not runny, but not just a blob, either. Sorta in betweenish. Add the 1 & 1/2 cups water.
Mix that up until it’s smooth. This is where I add the yeast if I’m using it. You can put it in the water to dissolve, or sprinkle it over and mix it in. I’ve done it both ways and they both work.
Mix the yeast in well. Then add 3 cups of flour.

Mix the flour in until blended.
Sprinkle the salt on top of the mixture. Salt can kill yeast, so I like to protect the yeast with some flour first.
Mix the salt in well. Continue to add flour a little at a time until it forms a ball.

This was at about 4 1/2 cups. If I were using my stand mixer, I would be able to get more flour incorporated. I can’t mix in as much by hand.
Now, turn your dough out onto a floured surface. Knead the dough, adding flour as necessary, until the dough is no longer sticky.
You can also do this step in the stand mixer with the dough hook.

Today is in the low 70’s and humid. I ended up using almost 6 cups of flour today and kneaded for about 15 minutes.
Again, if I had mixed it in the stand mixer I would not have had to knead for as long as I did. But that’s ok, I like to knead. 🙂
Oil a bowl and place the dough in it. Turn the dough over so that the top is now oiled. I like to use the same bowl for rising that I use for mixing.
After I turn the dough out, I put my bowl in the sink and run hot water into it. That does two things. It makes it easier to rinse out the bowl, and since I use stoneware, the bowl is warm for the dough.
I also like to use butter to oil my bowl. You can use any kind of neutral tasting oil. I like butter because there’s nothing in it I can’t pronounce. I also just like butter. 🙂

Now cover the dough and let it double in volume. This time will depend on the temperature of your kitchen and whether or not you used any commercial yeast.
Without extra yeast it will take anywhere from 4 to 6 hours. With yeast it will be anywhere from 1 1/2 to 2 hours.

Punch the dough down and divide into 3 pieces. Form into loaves.The loaves will be about 1 1/2 pounds, give or take.
Oil the baking pans, (again, I use butter) and place the loaves in the pans.
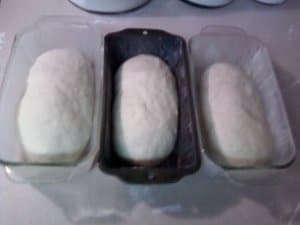
Cover again, and let rise till doubled. This rising should take only about half the time it took for the first rising.

Preheat the oven to 350°F degrees.
When the loaves have doubled, brush the tops with melted butter. This will give the loaves a golden color and a crispy top crust.
Slash the tops with a lame (pronounced laam), or a sharp serrated knife. This helps the loaves to rise.
You can get your own bread lame here.
And then, because I usually have left over butter and because, you know, I like butter, I pour some of the butter into the slashes.

Put the loaves in the oven and bake for 30 – 45 minutes.
The tops will be golden and the bottoms will sound hollow when you thump them with your finger.
Turn out of the pans on to a cooling rack. If the bottom crusts don’t have as much color as you would like, put them back in the oven without the pans for a few minutes.
If you can resist, don’t slice the loaves until they are cool.

The loaves will continue to cook as they cool and the texture will be better if you don’t slice it until then.
But, if you can’t, you can’t!
Spread it with something like, maybe butter. And maybe even some homemade jelly. That’s what I do anyway.
And there you have it! The Basic Sourdough Bread Recipe of your dreams!
Blessings!
More sourdough recipes for you to try:


Sourdough Sandwich Bread Recipe
Ingredients
- 3 cups sourdough starter that is active and bubbly
- 1 1/2 cups water
- 1 Tbsp sea salt if you use regular salt, only use 3/4 Tbsp
- 4-8 cups unbleached flour
- Melted butter for brushing on top of the loaves
- 1 Tbsp yeast or 1 package – this is optional. I use it with new starters or on days when I am in a hurry.
Instructions
- Stir down your sourdough starter and measure 3 cups into a large mixing bowl.
- Add the 1 1/2 cups water and mix that up until it's smooth. This is where I add the yeast if I'm using it. You can put it in the water to dissolve, or sprinkle it over and mix it in.
- Mix the yeast in well.
- Then add 3 cups of flour and mix the flour in until blended.
- . Salt can kill yeast, so I like to protect the yeast with some flour first.
- Sprinkle the salt on top of the mixture and mix that in well.
- Continue to add flour a little at a time until the dough forms a ball.
- Now, turn your dough out onto a floured surface. Knead the dough, adding flour as necessary, until the dough is no longer sticky. About 15 minutes.
- You can also do this step in the stand mixer with the dough hook. For about 8 minutes.
- Oil a bowl with butter or any other neutral tasting oil and place the dough in it. Turn the dough over so that the top is now oiled.
- Without extra yeast it will take anywhere from 4 to 6 hours. With yeast it will be anywhere from 1 1/2 to 2 hours.
- Punch the dough down and divide into 3 pieces. Form into loaves.The loaves will be about 1 1/2 pounds, give or take.
- Oil the baking pans, (again, I use butter) and place the loaves in the pans.
- Cover again, and let rise till doubled. This rising should take only about half the time it took for the first rising.
- Preheat the oven to 350°F degrees.
- When the loaves have doubled, brush the tops with melted butter. This will give the loaves a golden color and a crispy top crust.
- Slash the tops with a lame or a sharp serrated knife.
- Put the loaves in the oven and bake for 30 – 45 minutes.
- The tops will be golden and the bottoms will sound hollow when you thump them with your finger.
- Turn out of the pans on to a cooling rack. If the bottom crusts don’t have as much color as you would like, put them back in the oven without the pans for a few minutes.