Have you ever dreamt of baking the perfect loaf of sourdough? The key to successful sourdough baking is having a healthy sourdough starter, and making one is way easier than you might think.
With just a few simple ingredients and patience, anyone can create a bubbly sourdough starter at home that they can use in all of their favorite sourdough recipes.

This is a series of posts that were requested by readers when I first began blogging waaaay back in 2011. It walks you through the starting the starter process one day at a time. This is day 1.
To get you started on that beautiful sourdough journey, I’m going to walk you through how to make your own sourdough starter from scratch. All you need is 2 ingredients and some time.
First we’re going to start with everything you ever wanted to know about sourdough so you’ll understand what it is and how it works.
Well, OK, maybe not everything. But a little bit about sourdough and then how to start a starter.
If you’re not interested in the sciencey/history stuff, go ahead and just scroll on down to how to start the starter.
What is “sourdough” anyway?
The term “sourdough” is not about what the bread tastes like, it refers to the fact that it is a fermented dough. The fermentation is what gives it the sour flavor. The longer it ferments, the more sour it becomes.
Ever wonder how people made bread before the cute little yeast packets showed up at the grocery store?
They used the natural, wild yeasts that are available in the air around us.
There are approximately 1,500 strains of wild yeast that have been named and classified by scientists, and they estimate that is only about 1% of the total number of yeasts.
The cute little yeast packets in the grocery store use only one of those.
Just a thought, but if God created all those different yeasts that can be used for leavening bread, wouldn’t it be better to use more than one?
Now I am not a scientist or a doctor or a microbiologist, and I don’t even play one on TV 🙂 , so I don’t know the answer to that.
But I do know that people made bread for thousands of years before the cute little packets made it on the scene.
In fact, in some European family owned bakeries, they still use the same sourdough starter that their great, great, great-grands used.
How does “wild yeast” work?
Basically, yeasts work by feeding off the carbs in the flour. The carbs go through a fermentation process which produces alcohol and gas.
The gas is what makes the bread rise.
The alcohol is what causes the “souring”, and prevents the growth of mold and bacteria.
The sourness of the final product is determined by how “liquidy” (is that a word?) your starter is, and how long the bread is allowed to rise.
It is also determined by which of the yeasts are more abundant where you are using your starter.
That’s why traditional sourdough breads taste different in different places.
As the yeasts feed, they multiply exponentially. That’s why it takes about a week before your starter is ready to use.
The more yeast there is, the more gas is produced. If there’s not enough yeast, there won’t be enough gas to make the bread rise.
The older your starter, the better it works!
OK, on to starting the starter.
Sourdough Starter Recipe
Equipment:
- a glass bowl or jar (I use a wide mouth quart canning jar)
Ingredients:
- 1 cup flour*
- 1 cup room temperature or warm water**
Basically, use equal parts flour and water to start.
* You can use any kind of flour – all-purpose flour, bread flour, whole wheat flour, spelt flour, rye flour, teff flour, etc. Or a mixture of flour works just as well.
** You should use filtered water or bottled water. You can use tap water, but you need to let it sit for 24 hours to allow the chlorine to dissipate. Try to use warm water, or at least room temperature. Just make sure it’s not cold water. Yeast doesn’t like cold water.
Instructions:
All you do is mix the flour into the water in the jar and scrape down the sides. It doesn’t have to be smooth, it’s OK to have lumps.
Now you need to cover it to keep out dust and stuff.
It also tends to attract fruit flies in the summer.
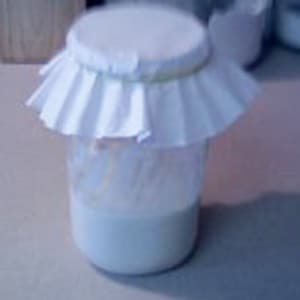
I use a paper coffee filter secured with a pony tail holder. You can also use a clean dishcloth. Or a napkin.
Just make sure that whatever you use allows the gases to escape, but doesn’t allow dust, fruit flies, or curious kitties in.
I also like the coffee filter option because I use a sharpie to write the date that I start it, and make a mark for every time I feed it.
Cuz sometimes I lose track of days.
But that’s probably just me. 🙂
After you mix it up and loosely cover it, put it in a warmish, out-of-the-way place on the counter so it’s not in your way all the time.
I understand the top of the fridge is a good place for some people.
I like to have mine a little closer to eye level so I don’t forget to feed it. Ask me how I know that.
The Care and Feeding of Your Sourdough Starter
About 12 hours after you start it, you are going to need to feed the starter.
It may or may not have started doing anything by then. Just feed it anyway.
To feed it, stir it down and add 1/4 cup water and 3/8 cup flour.
I like to mix in the water first and then the flour. It mixes easier that way. Again, it’s OK if it has lumps, they will go away.
Don’t forget to scrape down the sides so none of it dries out.
In another 12(ish) hours you are going to feed it again.
This time, though, after you stir it down, take out about half of what’s in the jar. This is called the discard.
Add back in 1/4 cup of water and 3/8 cup flour.
Now, I know, I know, you’re thinking that throwing it out seems to be wasteful.
But it’s really important that you don’t starve your starter. You have to give it enough flour to keep it feeding for several hours.
If you don’t throw half of it out, you would need a ginormous container at the end of 14 feedings!
What to do with the sourdough “discard”
Luckily, there are probably thousands of recipes that have been developed to use that discarded starter.
And yes, you can use the beginning-the-starter-but-not-quite-there-yet starter that you are taking out of the jar every time you feed it.
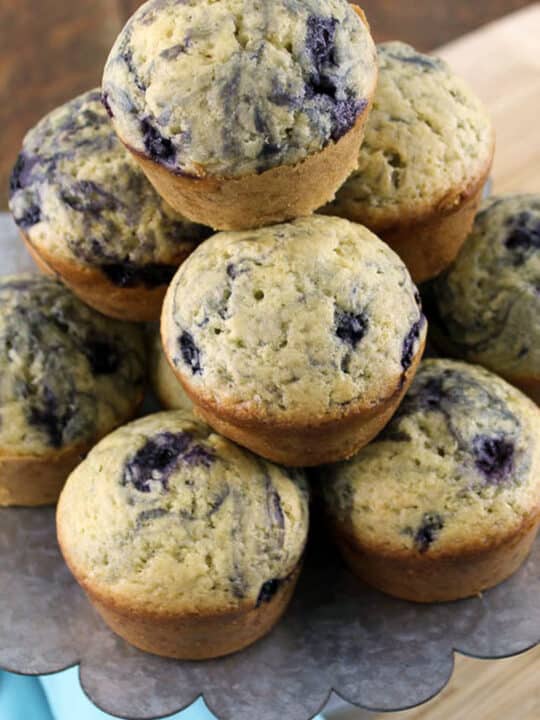
This recipe for Sourdough Waffles is one of my favorites.
So, about every 12 hours, you need to get rid of about half of what’s in the jar, and feed it again.
I do it in the morning when I get up and at night before I go to bed.
Is that exactly 12 hours?
No.
But that’s OK, sourdough is really quite forgiving.
Even if you don’t think it’s doing much, just keep feeding it.
It may or may not at some time form a layer of clearish-yellowish-brownish liquid either on the top or bottom. And even sometimes in the middle.
Hooch
That liquid is called “hooch” and is the alcohol forming.
If there is a lot, that can indicate that it’s not getting enough flour at feeding time. So if it happens every time, give it a little more flour.
Just stir the hooch back into the rest when you feed it.
It might be kinda smelly, but that is OK too. The smell and the color will depend on what kind of flour you are using.
My whole wheat starter smells different than my white flour starter.
If you miss a feeding, all is not lost! Just pick up where you left off.
I like to mark the lid every time I feed it because you need to feed it at least 14 times before it’s ready to use.
By then, the yeasts will have multiplied to the point where there is enough to make the bread rise.
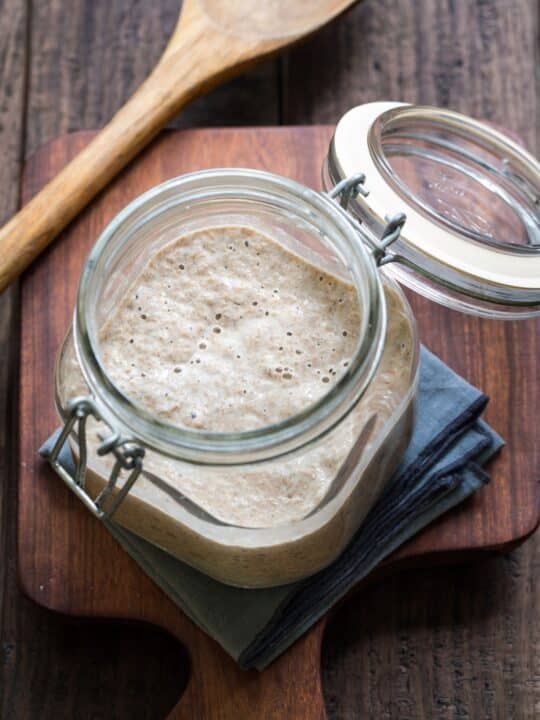
After about the third or fourth day, you should be able to see bubbles forming in the starter.
This may start happening before that, but should definitely be happening by the fourth day. If not, you probably need to start over.
After about the fifth day it should be filling the jar 1/2 to 3/4 full between feedings. The process can sometimes be slower if your kitchen is cold, so keep that in mind.
I started a new starter this morning so I could take pictures to show you what it may look like at each stage.
I’ll post them every day until we get to the point when we can actually start using it.
Then I’ll post some recipes and suggestions on what to do with it. You’d be surprised at what all you can do with a sourdough starter!
Just know that after it is strong enough to use, you can keep about a cup of it in the refrigerator and only feed it once a week.
I don’t want you to think you’re going to be feeding it twice a day for the rest of your life!
So, ready for some pictures?


12ish hours later:


It happened to be warm in the kitchen today, so things got going pretty quickly. I don’t remember hooch and bubbles before the 1st feeding before. So if you don’t get any, don’t worry.
Tomorrow I’ll give you an update on the starter, and some ideas on what you can do with it besides making a loaf of bread.
Continue to sourdough starter day 2 here.
Blessings!