
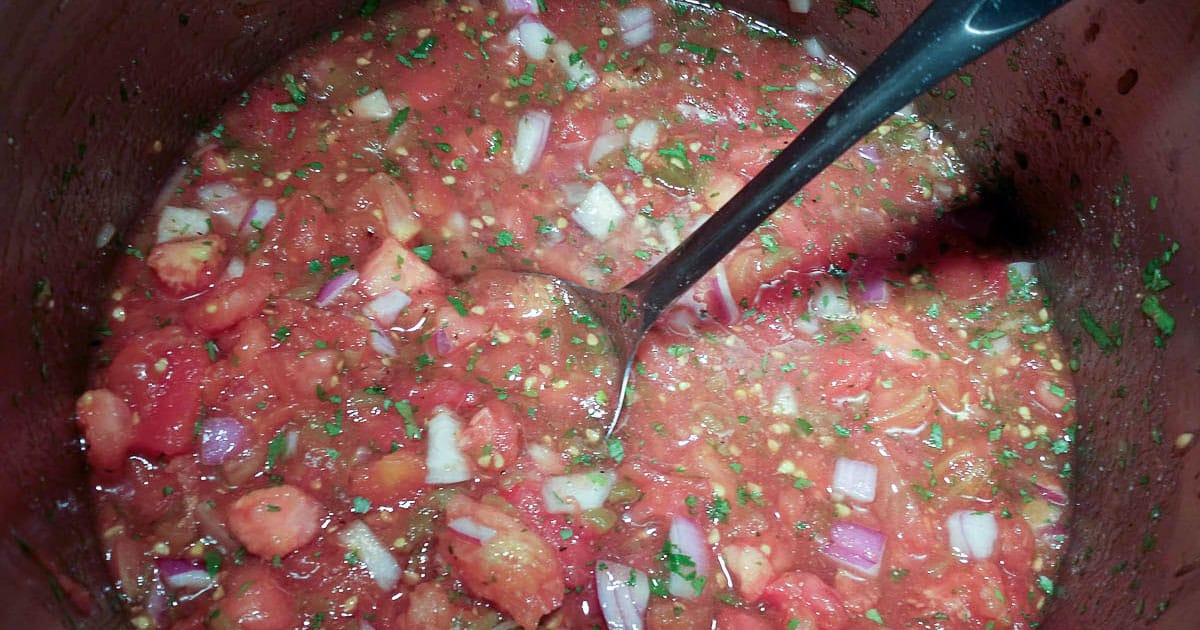
Full of tomatoes and onions with the perfect amount of heat just for you! This canning salsa recipe is going to be a new family favorite.

Is this you?
You’ve had an amazing year in your garden.
And now you’ve come to that part of the year where it’s getting hard to keep up with all the tomatoes.
If so, I have good news!
When you’re drowning in tomatoes, it’s the perfect time to make a great big batch of homemade salsa and can it up!
That way, in the middle of winter when you’re dreaming about those big, red, juicy tomatoes still warm from the vine, you can pop open a jar of salsa to satisfy that craving.
Salsa and chips.
Chips and salsa.
Anyway you say it, I just hear, “Awesome yumminess”.
As a bonus, this is a water bath canning recipe!
Although everything that goes into salsa is a vegetable (and they are all low acid foods), because we’re adding lemon juice and vinegar (which are acidic ingredients), the acid level is sufficient to process safely in a boiling waterbath.
So that means no expensive equipment is needed for this pantry staple!
If you’re new to canning or just need a refresher, you can go here for information and general safety guidelines.
Here is what you will need to have these gorgeous jars of summer sunshine sitting on your pantry shelves.
Canning Salsa Recipe
Ingredients
- 12 cups peeled, cored, and diced tomatoes (about 6 pounds)
- 3 cups chopped red onions
- 15 cloves of garlic
- 1 1/2 cups tightly packed finely chopped cilantro
- 1 Tablespoon sea salt
- 2 teaspoon coarsely ground black pepper
- 1 1/2 teaspoon ground cumin
- up to 2 cups hot peppers, mild peppers, or sweet peppers of your choice (optional)
- 1 cup Apple Cider Vinegar, Red Wine Vinegar, or white vinegar
- 1/4 cup lemon juice or lime juice (or a mixture)
Equipment needed for Canning Salsa
- waterbath canner or deep pot
- large stainless steel pot for heating the salsa
- pint jars, 1 1/2 pint jars, or quart jars
- new lids and rings/screw bands to fit the jars
- canning funnel
- lid lifter
- jar lifter
- old towels
How many jars you end up with is dependent on what kind of salsa you prefer.
Are you a chunky salsa kinda person? If so, you’ll end up with 6 to 8 pints.
Do you like your salsa pretty smooth? Pureeing it will give you 3 to 4 pints.
Or maybe you’re a middle of the road salsa person. And if you like your’s half smooth and half chunky.
If that’s the case, your yield will fall somewhere between the other two depending on your chunky to smooth ratio.
Whichever way you prefer to eat your salsa, the process to make it is the same.
So let’s get started!
Instructions
Preparing your Canner & Jars
Put your water bath canner on the stove and put the jars you are going to use into it. Fill all the jars with water all the way to the top.
Now fill the canner with enough water to reach the top of the jars.
This makes sure that there will be enough water in the canner for processing.
Go ahead and turn the heat on to high. It’s gonna take a while to come to a boil. When it does, allow the water to boil for a full 15 minutes and then turn it down to simmer. The jars need to be sterilized by the boiling water.
You need to also get your lids ready to go following your manufacture’s instructions. I usually toss the lids and rings into a pan with water to cover and put it on the back burner.
When it comes to a boil I allow it to boil, again, for 15 minutes, and then turn it down to low until I’m ready for them.
Preparing the Salsa Veggies
Now it’s tome to start chopping.
Tomatoes
If you like your salsa chunky, you will need to start by removing the skins and cores from the tomatoes.
This post on Homemade Enchilada Sauce walks you through that process in detail.
After you have removed the skins and cores, simply dice the tomatoes up to the size you prefer. When that’s done toss them in your big stainless steel pot.
If you are going for a smooth salsa, you can leave the skins on. You will just remove the cores and quarter the tomatoes and put them in your big pot.
Half and halfer? Skin, core, and dice about half and place these in a separate bowl. Core and quarter the rest and put them in the large pot.

Onions
Chunky: Remove skins, cut off the ends and dice to your desired size. Put these in the pot with the tomatoes.
Smooth: Remove skins, cut off the ends, cut into quarters and toss them in the pot.
Half and half: Remove skins and cut off the ends. Dice half of the onions and add to your diced tomatoes in the bowl.
Quarter the rest and throw them in the pot with your quartered tomatoes.
Garlic
Peel the garlic cloves. Mince it pretty finely and toss it in the big pot.
If you are going for the smooth texture, you can skip the mincing and just pop it in the pot.

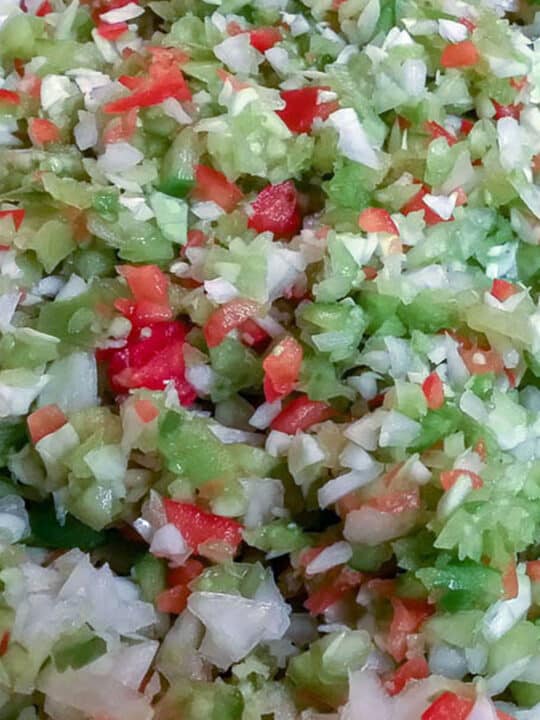
Peppers
You can really use any kind of peppers you want to. Or no peppers at all if that’s your thing.
Just make sure that you don’t increase the total amount of peppers in the recipe. Too many peppers can make it unsafe for waterbath canning.
I just used a jar of the Hatch Chilies that I canned earlier this year, but you can go from mild to 911. You do you!
3 things to remember about peppers is:
- the seeds are the hottest part,
- wear gloves when you are handling the really hot ones, and
- for the love of all that you hold dear, DON’T TOUCH YOUR EYES BEFORE YOU WASH YOUR HANDS!!!
Now that we’ve gotten that out of the way, you’re going to do the same thing with that peppers that we’ve done with everything else.
De-seeded (if you want to) and diced for the chunky (or minced if you like just little bits of heat), de-seeded and/or halved for the smoothers, and half and half for the half and halfers.
Half and halfers, don’t forget to separate your peppers into the bowl and the pot.

If you have questions about the peppers, the USDA’s National Center for Home Food Preservation always has up to date information on canning.
Cilantro
Remove the leaves from the stems. Stack a bunch of leaves on top of each other and roll them up pretty tightly.
You can either use a very sharp knife to cut thin slices, or a pair of herb scissors. I love my herb scissors. They make cutting up herbs go really fast.
Making the Salsa
Now you’re going to add in all the herbs and spices, salt and pepper, vinegar, and lemon/lime juice.

Taste the salsa now if you are all chunky. Adjust the amounts of spices and seasonings to your liking. I usually mix it up good and then ladle some back out to eat with tortilla chips for dinner. 🙂
IMPORTANT NOTE: Make sure you are using commercially bottled lemon juice and/or lime juice. It has a specific acidity level that needs to be present in order to process the salsa in a waterbath canner.
Now you’re ready to heat up the salsa. Turn your burner on to medium heat and bring the salsa to a boil.
Make sure that you are stirring frequently to make sure nothing sticks or scorches. Once it comes to a boil, turn the heat down a little and let it simmer for 10 minutes, or until it reaches the thickness you like for a chunky salsa. When it reaches the consistency you like, move on to the canning step.
How long it takes to reach the thickness you are looking for will depend on what type of tomatoes you are using. The more meat on the tomatoes, the less time it takes to thicken up.
For a smooth salsa, either use an immersion blender to puree it in the pot, or run it through your blender or food processor in batches.
Once it’s the texture you want, put it back in a clean batch on the stove and bring it back to a boil before going on to the next step.
For the half and half salsa, puree the stuff in the pot and then add in the diced stuff you put aside earlier. Bring it back to a boil.

Canning the Salsa
Carefully remove the jars from the boiling water, and pour the water back in.
Now use a canning funnel so you don’t get salsa all over the rims of your jars and fill the hot jars leaving a 1/2 inch headspace.
Use a bubble popper or a thin knife to remove any air bubbles and top off the jar if necessary. Again making sure to leave 1/2 inch headspace.
Next, wipe the rims of the jars with a clean, damp cloth to make sure the rims are clean.
Put on the lids and tighten down the rings finger tight. If the rings are too tight the air won’t be able to escape and the lids will buckle and not seal.
Carefully put the closed jars into your waterbath canner.
The water should be simmering when you put the jars in and it should cover the tops of the jars by a minimum of 1 to 2 inches.
Cover the canner, turn the heat to high and bring the water to a full rolling boil. When the canner comes to a boil, start your processing time.
Process your salsa for 15 minutes.
Don’t forget to adjust your processing time according to the altitude adjustment chart.
After the processing time is up, turn off the heat and remove the jars from the canner.
Make sure you lift the jars straight up out of the canner. The jars haven’t sealed yet, so if you tilt the jars they will leak and you might not get a seal.
Place the jars on a double layer of towels out of drafts and leave them undisturbed for a minimum of 12 hours. The contents of the jars will still be hot for a while after processing, so make sure they are not in the way.
Checking the seals
After 12 hours it’s time to check to make sure the jars sealed properly. If a jar hasn’t sealed, put it in the fridge and eat it within 2 weeks.
For the sealed jars, wipe down the jars and label and date them, then put them in the pantry.
Storing your Salsa
Home canned salsa should be kept in a cool, dark, dry place. Just a regular cabinet works fine. Not next to the oven, dishwasher, or fridge are the best options.
Stored in optimal conditions, they say that salsa will stay good for up to 5 years.
I don’t know if that’s true, though. Because it always gets eaten waaaaaay before that around here. 🙂

Frequently Asked Questions About Canning Salsa
I like all kinds, but paste tomatoes (like Roma tomatoes or Amish Paste tomatoes) are usually recommended. They are “meatier” and have less liquid than a regular slicing tomato.
That is entirely up to your individual taste! You can use green bell peppers, poblano peppers, jalapeno peppers, green chiles, you name it. Just make sure that you don’t use more than the total amount of peppers listed in the recipe to ensure that it is safe for canning in the waterbath caner.
Properly sealed and stored in a cool, dark place, home canned salsa will last for at least 5 years.
More waterbath canning recipes you will love:


Salsa Recipe for Canning
Ingredients
- 12 cups peeled cored, and diced tomatoes (about 6 pounds)
- 3 cups chopped red onions
- 15 cloves of garlic
- 1 1/2 cups tightly packed finely chopped cilantro
- 1 Tablespoon sea salt
- 2 teaspoon coarsely ground black pepper
- 1 1/2 teaspoon ground cumin
- 2 cups hot peppers mild peppers, or sweet peppers of your choice (optional)
- 1 cup Apple Cider Vinegar Red Wine Vinegar, or white vinegar
- 1/4 cup lemon juice or lime juice or a mixture
Instructions
- Prepare your canner and jars, keeping jars hot until needed
- Chop all the veggies and add to large pot
- Add the herbs and spices, salt and pepper, vinegar, and lemon/lime juice
- Bring salsa to boil, stirring frequently
- Fill the hot jars with hot salsa leaving a 1/2 inch headspace
- Remove trapped air bubbles and top off the jar if necessary
- Wipe the rims of the jars with a clean, damp cloth
- Attach lids and tighten screw bands finger tight
- Place jars in canner
- Process 15 minutes for pints, adjusting time for your altitude
- After processing remove the jars and place on towels in a draft free area
- Let sit undisturbed for 12 to 24 hours before checking seals
- Label and date and place in cool, dry, dark cabinet for storage
Love your recipe! I used half red wine vinegar, half white vinegar, and lime juice. It’s delicious and I have an abundance of salsa since I had around 25 pounds of Roma tomatoes.
.