
Follow these easy instructions for canning chicken at home. Learn how to can chicken safely in your own kitchen with this simple how-to guide.

Already cooked chicken.
You see it in recipes all the time.
You know those ones that promise dinner bliss in 20 minutes or less?
But what if you didn’t roast a chicken for Sunday dinner? Or pick up a rotisserie chicken on your way home from work?
How in the world are you going to grab onto that elusive 20-minutes-or-less-blissfullness so you can get the kids to practice on time?
Never fear, my friend! I’ve got your back!
I’m going to teach you how to can chicken.
No, really!
Having jars of canned chicken in your pantry opens up a whole new world of dinner possibilities that don’t include a deli detour on your commute.
And you can even modify a recipe so you can use the canned chicken. Like, for instance, my Chicken and Broccoli in White Wine Sauce.

Why Can Chicken?
If you’ve been around here for even a short while, you know that one of the things I really love is saving money.
That doesn’t mean I’m cheap, I just like to get a good deal.
One of my favorite ways to save money is stocking up on food when it’s on sale.
Y’all know I’m all about stocking up!
And one of my favorite ways of stocking up is to watch the sales on Azure Standard.
They are a bulk supplier of organic and all natural foods and everything you need for our home. You should check them out here.
Here’s why I believe everyone should have some type of food storage
I try to always get grass fed or pastured meats. Those tend to be more expensive than other meats, though. So when they go on sale, I’m all over it!
I found a great sale on pastured chicken this week and decided to stock up.
Stocking up on meat can sometimes be a problem, unfortunately. If you don’t have a lot of freezer space you can’t always take advantage of the lower prices.
So, what’s a gal to do?
Can, of course!
This article from Colorado State University talks about the costs of canning food.
Canned meats are the backbone of my food storage. They are deliciously flavorful and you never have to remember to get stuff out to thaw!
Canning chicken is super simple and frees up a lot of freezer space.
So today I’m going to teach you how to can whole, bone in pieces of chicken like legs and thighs, as well as canned chicken breast, and breast meat cut into chunks.
You can even use this method for canning whole chickens if they are small enough. Just de-bone them and pop ’em in a jar!
You can process the pieces plain, or with spices.
I often add a teaspoon of my homemade bouillon to the pint jars of chicken chunks. That’s what you will see in some of the pictures.
Alrighty then! Let’s get started!
If you’re new to canning or just need a refresher, you can go here for information and general safety guidelines.
Ingredients and Equipment for Canning Chicken
- Pressure canner (this is the one I have)
- Canning jars (I like to use pints for chunks and 1 1/2 pints or quarts for bone in pieces)
- One time use lids and rings/screw bands
- OR Tattler reusable lids
- Jar lifter
- Lid lifter
- Canning funnel
- Sea salt or canning salt (NOT table salt. The iodine will discolor whatever you are canning)
- A pan to heat water for the canner and simmer your lids in
- And, of course, some chicken. 14 to 17 pounds of boneless, skinless chicken breasts will give me a full canner load of 8 pints
The size jars you need depends on how many people you will be feeding at one time.
As mentioned above, I like to put my chunks in pint (2 cup) jars.
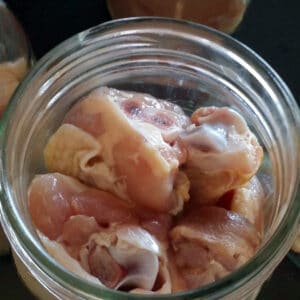
Canning Chicken Chunks ~ Raw Pack Method
Canning raw chicken is super simple and doesn’t take as much time (or as many pans) as it does to cook the chicken first. So that’s the way I do it.
Make sure the rims of your jars have no nicks or cracks. Either of those will cause the lids to not seal properly.
Wash the jars in hot soapy water and rinse well, or run through the dishwasher with a heated dry cycle. You need to keep the jars hot until you are ready to use them
Prepare your lids according to your manufacturers’ directions.
Heat some water to a boil and then reduce to a simmer. This is the water that will go into your pressure canner. Check the directions that came with the canner for the amount you need,
I actually put my regular ole lids in there to heat them up and soften the sealing compound.
Cut your chicken into about 1 inch cubes. They don’t have to be perfect, but try to get them close to the same size.
Use your canning funnel to fill jars. Put the raw meat pieces in your hot jars, leaving 1-1/4 inch of headspace. The funnel helps keep the rims of the jars clean.

This is a raw pack method so you won’t be adding any liquid to the jars. As the chicken processes, it will create a broth.
Put 1/2 teaspoon salt into each pint jar.
I will sometimes put 1 tsp of my homemade chicken bullion in each pint jar. My bullion doesn’t have salt in it, so if you want to use bullion with salt, omit the sea salt.
You can put them in before the chicken or after, it makes no difference. I typically put it in before, but that’s because I’m liable to forget it if I don’t… 🙂
Canning Chicken Breasts and Bone In Pieces ~ Raw Pack Method
NOTE about skin on pieces: Some people will tell you to to remove the skin and excess fat from the pieces before canning. I never so that.
The fat tends to have a lot of flavor in it that gets transferred to the chicken during processing. The fat also keeps the chicken from drying out. So I always leave it on. But it’s totally up to you!
If you are canning boneless breasts by themselves, just pack as many as you can get into the jar, leaving a 1-1/4 inch headspace. A 1 1/2 or quart jar is great for these, depending on how big they are.
With pieces on the bone like drumsticks and chicken thighs, put the thighs in first and then pack the drumsticks around that. If you alternate the direction of the legs, you can get more in the jar.

Add sea salt. Use about 1 teaspoon in the quart jars.
Attaching Lids and Rings
Which ever type of chicken you are canning, the next step is to dip a clean rag or paper towel in some vinegar and wipe it around the rim to remove any juice or chicken bits that may be there.
If the rims aren’t clean, you won’t get a good seal.
Using your lid lifter, remove the lids from the simmering water and place them on the jars.
Screw on the rings or bands until they are finger tight. Don’t use a lot of force. If the rings are too tight the air won’t be able to escape and the lids will buckle and not seal.
And that’s just no bueno…
If you are using the Tattler lids, follow the instructions that came with them. They have a slightly different process.
Processing the Chicken
Now you need to put that simmering water into the canner up to the level your instructions tell you. If you add a splash of distilled vinegar to the water, it will cut down on residue from the water on the outside of the jars.
Now add the jars. They can be close to each other, but try not to let them touch each other.
Make sure when you move the jars in and out of the canner that they are always straight up and down so nothing leaks and gets under the lid.
If you have a big canner and are doing more than 1 layer, make sure that you have another rack between layers. If you don’t have another rack, you can stagger the jars so they are not directly on top of each other.

Once the jars are in, close and lock the lid.
Turn the burner on high and bring the water in the canner to a boil.
Again, following the directions for your canner, exhaust steam from the canner. For my canner, it’s for 10 minutes.
After the steam has exhausted for the required length of time, place the weight or pressure regulator over the vent.
Watch carefully as the pressure begins to build up to the correct amount.
Once the pressure has reached the desired level you will most likely have to play with the heat source to keep the pressure steady. You don’t want to have the pressure up too high. A little high is OK.
But if it goes below the required pressure you have to bring it back up and start timing over again.
You also don’t want the pressure to be going up and down like a yo-yo. After you’ve done this a couple of times you’ll find the sweet spot on your stove.
Processing Times for Canning Chicken
The processing times vary depending on whether the chicken is boneless or bone in, and also depending on the size of the jars.
And remember, all canning recipe pressures are for processing at sea level. If you are above sea level, don’t forget to adjust the pressure using this altitude adjustment chart.
Boneless chicken
For chunks or the boneless breasts, pints need to be processed for 75 minutes, and 1 1/2 pints or quarts need to be processed for 90 minutes.
Process at 11 pounds pressure on a dial-gauge pressure canner, or using the 10 lb weight on a weighted gauge canner.
Bone In Chicken
Drumsticks, thighs, or breasts with the bone, pints need to be processed for 65 minutes, and 1 1/2 pints or quarts need to be processed for 75 minutes.
Process at 11 pounds pressure on a dial gauge pressure canner, or using the 10 lb weight on a weighted gauge canner.
If you have a mixed jar, use the longer processing time.
After processing, turn off the heat and allow the canner to cool down. Don’t run cold water on it or open the lid while it’s under pressure. That would cause the jars to explode.
Major no bueno…
Removing the Jars after Processing
Just be patient and let it cool all by itself. Go do something else for a while. They usually take about 30 minutes or so to cool off.
Once the pressure gauge has reached zero, carefully remove the pressure regulator or weight. It’s not a bad idea to wait another 10 minutes before opening the lid.
Now, carefully, unlock the lid and remove it with the lid facing away from your face so you don’t get a face full of steam. You’ll thank me for that later.
The jars will still be extremely hot and the contents will still be boiling. So be careful when you take the jars out.
Using the jar lifter, remove the jars one at a time from the canner. Remember, don’t tilt the jars. Straight up. The lids will probably not have formed a seal yet. That usually doesn’t happen until the contents begin to cool down and pull a vacuum.

Place the jars on a few layers of towels on a surface that’s out of drafts to cool. If you have a very drafty house, put another towel over the top of the jars.
Leave the jars undisturbed for a minimum of 12 hours. After 12 hours check the seals.
If any jars didn’t seal, discard the contents.
Remove the rings from the sealed jars and wash off the jars. You don’t want any residue on the jars that might attract any critters.
Storing Canned Chicken
Home canned chicken will stay good for up to 10 years if stored in optimal conditions. What are those optimal conditions?
Dark, dry, cool. That’s pretty simple really. If you happen to be lucky enough to have a root cellar, that’s perfect. A cool basement is also a great place.
But sometimes you just have to stash stuff wherever you have a spot to stash. In pantries, closets, and under beds are all places I have used. Just keep a list of what you have where!
For the best taste, texture, and nutrition, this canned chicken should be used within 3 years. But I’ve never had it last that long at my house.
Using Home Canned Chicken
This chicken can be substituted for cooked chicken in any recipe. I use the chunks for chicken potpies, chicken salad, chicken enchiladas, casseroles, and I’ve even battered and fried them for “chicken nuggets”.
Whole breasts I like to shred, which is so easy to do with this stuff, and add BBQ sauce or fajita marinade.
The possibilities are almost endless. And who doesn’t love that?
I hope that now we’ve walked through the process you feel confident canning chicken at home.
What would be your favorite way to use this canned chicken? Let us know in the comments.
Blessings!

Frequently Asked Questions About Canning Chicken
As long as the seal is intact and it has been properly store, home canned chicken will keep for several years. Most people suggest eating it within 2 years for the best texture and flavor.
Absolutely not! Meats MUST be canned in a pressure canner to be safe to eat. Botulism poising can be fatal. Don’t take that risk with your health!
No siree! Pressure cookers have not been shown to be safe for canning. Check out the National Center for Home Food Preservation for more details.
Yes you can! Since this is pressure canned for the maximum amount of time, you can add anything you want to your chicken before canning.
More canning recipes you should try:


Canning Chicken Chunks or Bone in Pieces
Equipment
- Pressure Canner
- Pint or quart jars and rings
- New lids
- Canning Tools
Ingredients
- 15 pounds chicken breasts for a full canner load of 8 pints of chicken chunks
- Sea salt
- Bouillon optional
Instructions
- Prepare your jars and lids and keep them hot until needed. Check the air vent and overlock on the canner lid to make sure they are not blocked.
- Rinse chicken pieces and pat dry. Cut breasts in chunks or leave whole.
- Pack the chicken chunks or pieces tightly into the jars leaving 1-1/2 inch headspace.
- If you are adding salt, use ½ teaspoon in pints, ¾ teaspoon in 1 ½ pints and 1 teaspoon in quarts.
- Wipe the rim of the jar with a clean cloth or paper towel dipped in vinegar. Place lid. Screw rings on finger tight.
- Put proper amount of warm water in canner, adding a splash of white vinegar if you have hard water.
- Place jars in canner. Seal the canner lid and turn heat to high.
- Allow the canner to vent for the specified length of time for your canner.
- Now put the regulator on the air vent and bring it up to pressure. Once it has reached the required pressure, start your timer.
Processing Times
- BONELESS: Process pints at 10 pounds pressure for 75 minutes, process 1½ pints and quarts at 10 pounds pressure for 90 minutes.
- BONE IN: Process pints at 10 pounds pressure for 65 minutes, process 1½ pints and quarts at 10 pounds pressure for 75 minutes.
- Don’t forget to adjust the processing pressure for your altitude.
- When the processing time is up, turn off the heat and allow the pressure to return to zero.
- Once the pressure is zero, remove the regulator and wait another 5 to 10 minutes before unsealing the lid.
- Make sure the lid is facing away from you when you open the canner.
- After processing, remove the jars from the canner and allow to sit undisturbed for a minimum of 12 hours.
- After 12 hours, check the seals, wash and label the jars, and put them away.
Thank you for such helpful information
Hi Joanne,
I’m so glad it was helpful!
My boned in chicken looks great in the jars, but is it safe to eat if the chicken is sticking above the liquid about an inch? I used the raw pack method and all my jars (quart) are a little low in liquid. Thanks.
Hi Vickie!
I’m so happy you took the leap and canned some chicken. The chicken is perfectly safe! Things often stick up above the level of the liquid in the jars, so all is well.
Cery
Raw packed pressure canned chicken makes it so easy to pull the chicken out of the jars, shred it, and make chicken casserole with crushed Ritz crackers and butter on top. Such a convenience!!!
This recipe looks great and easy. My husband and I have been pressure canning Chili Verde with cooked pork and spaghetti sauce with cooked sausage. We want to try this recipe. We have a question for you. Our pressure canners all are weighted. We have a 15 lb weight. It seems that most of the recipes I have seen use a 10 lb weight. We have adjusted our canning times slightly and never have had a problem. Is it okay to use a 15 lb weight when canning raw chicken and if so, what would the time adjustment be?
Hi Susie!
It’s perfectly fine to use more pressure than a recipe calls for. The altitude adjustment charts don’t go above 15 lbs. That being said, you the times listed in the recipes, as there is not any chart (that I know of) that gives safe recommendations for less time at higher pressures.
Cery